CAPTCHA is an acronym for Completely Automated Public Turing test to tell computers and humans apart. Typically, CAPTCHA serves-up a checkbox that must be checked before a form can be submitted to prevent non-humans from submitting.
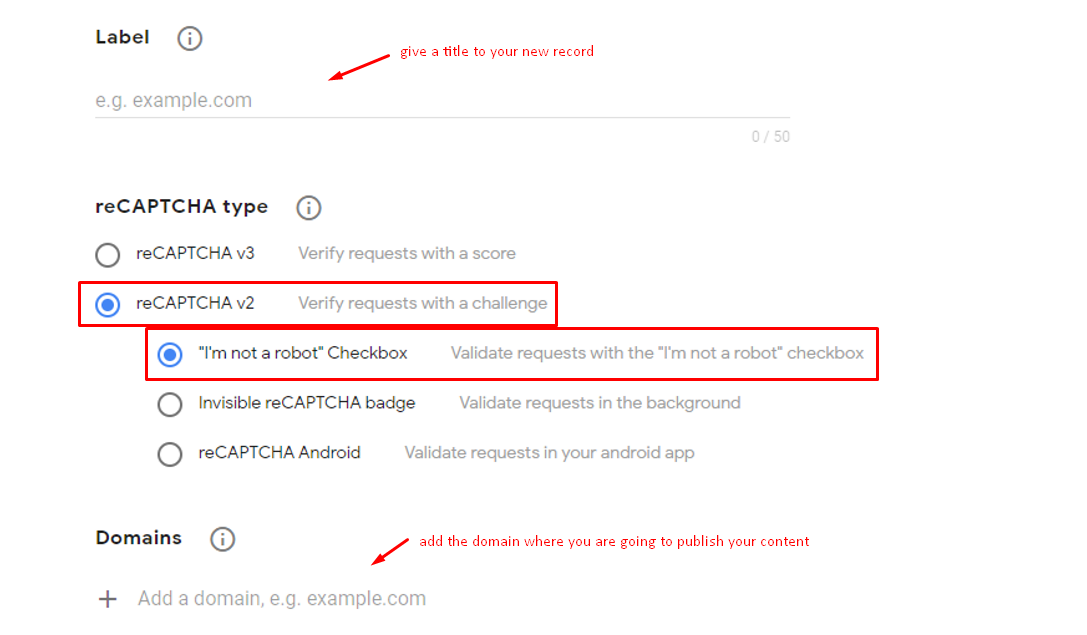
You can use Google’s reCAPTCHA v2 to add this functionality to your Ion experiences. First, you’ll need to pick up a secret key and a site key by visiting this link (https://www.google.com/recaptcha/admin/create) to log-in to Google reCAPTCHA v2. You can log-in using an existing Google account or by creating a new one.
Attachments
Server scriptlet and javascript samples are attached to this support post, so you can add them into your console’s server scriptlet and script libraries, respectively.
You’ll use these attachments and follow the steps listed below to add reCAPTCHA v2 to your Ion Forms.
Server Scriptlet
Let’s add the server scriptlet to your console first and make minor adjustments to the attached server scriptlet sample:
- Open the “reCAPTCHA Server Scriptlet” attachment and copy the code (reCAPTCHA Server Scriptlet.txt).
- Click the Libraries menu in your console’s side nav and select “Server Scriptlets.”
- Add a scriptlet category or navigate into an existing one.
- Click green ” New scriptlet” button to add a new reCAPTCHA server scriptlet to the selected category.
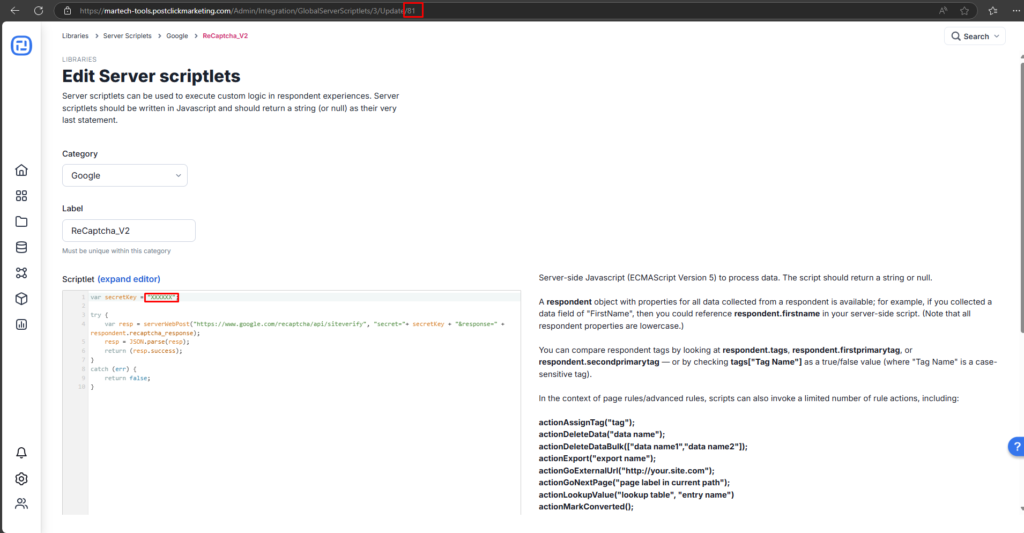
- Give your scriptlet a title and paste “reCAPTCHA Server Scriptlet” code into the editor.
- Replace secret key example value of “XXXXXX” with your secret key. Please note that the double quotes should remain wrapped around your value.
- Save
- Click scriptlet title to navigate back into the scriptlet and view the URL in your browser window. Make a note of the sscID value in the URL in your address bar. This value will be referenced in the javascript set up in the next section.
Javascript
Next, let’s add some javascript to your console that will run the server scriptlet and perform CAPTCHA validation upon form submission:
- Open the “reCAPTCHA Page Script” attachment and copy the code (reCAPTCHA Page Script.txt).
- Click Libraries menu in your console’s side nav and select “Scripts.”
- Add a script category or navigate into an existing one.
- Click green “New script” button to add a new script to the selected category.
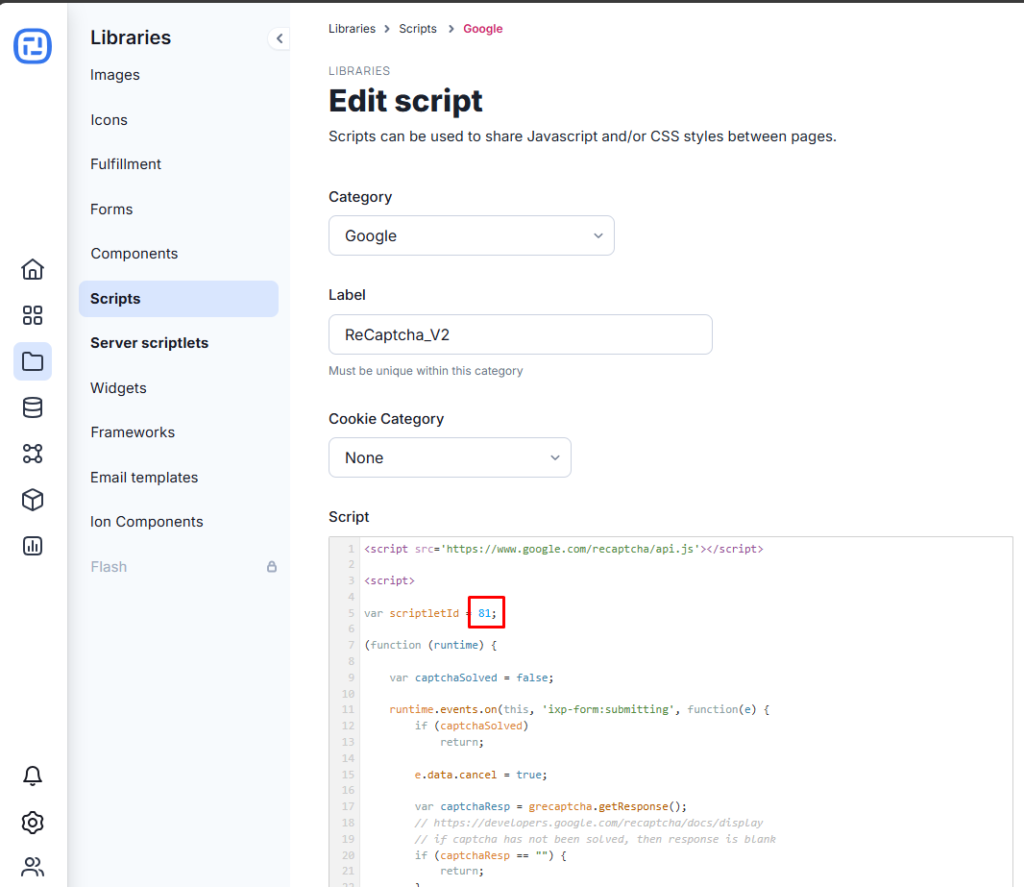
- Give your script a title and paste “reCAPTCHA page script” code into the editor.
- Replace the scriptletID value of X with sscID value from your server scriptlet as noted in step 8 of Server Scriptlet section above.
- Save
Widget
Now we are going to create a widget that will be dragged into your ion page(s) to add CAPTCHA to your form(s):
- Open the “reCAPTCHA Widget” attachment and copy the code (reCAPTCHA Widget.txt).
- Click the Libraries menu in your console’s side nav and select “Widgets.”
- Click green “New widget” button at the top of the page to add a new widget.
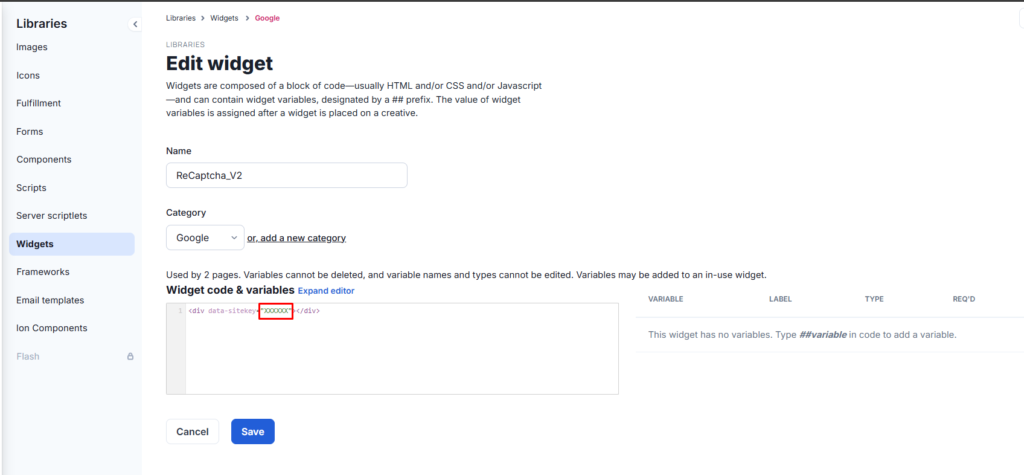
- Give your widget a name and select a category or create a new one for your widget.
- Paste “reCAPTCHA Widget” code.
- Replace site key example value of “XXXXXX” with your site key. Please note that the double quotes should remain wrapped around your value.
- Save
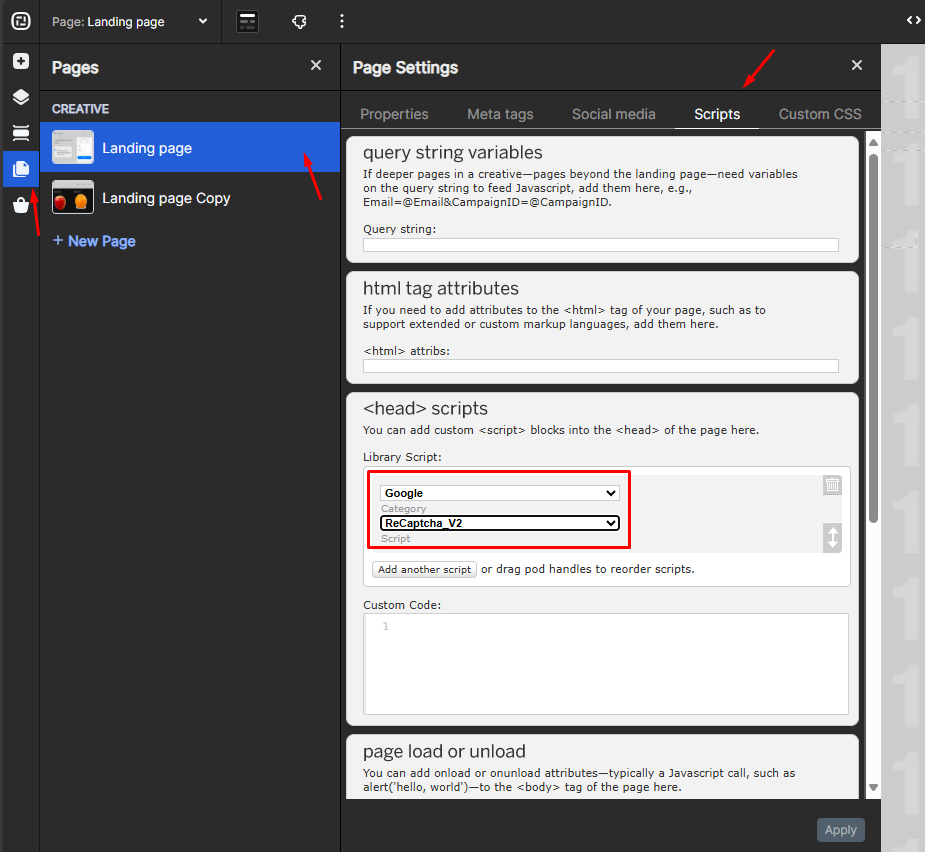
Page Setup
With the scriptlet, page script and widget ready, it’s time to bring it all together in your page.
- Navigate into your form page
- Open the script editor and add the reCAPTCHA page script to the <head>
- Click OK
- Hover over the Basics category in your creative studio and drag widget icon into your form just above the submit button.
- Select reCAPTCHA widget
Your form should now be all set to use CAPTCHA to verify that a human is submitting the form and not a robot!
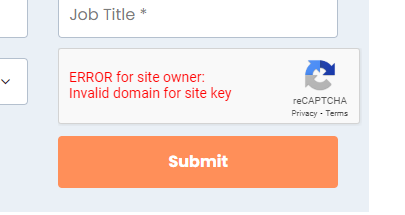
*Notes: After following this tutorial, you can preview your Ion experience and run a test. If you see the error message below, you will need to check and fix the domain you added in Google settings:
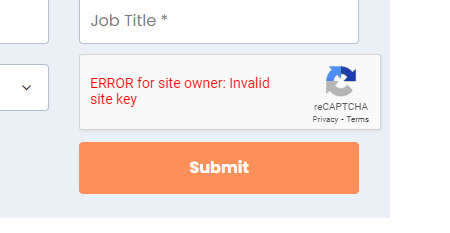
And if you see the error message below, you will need to check and fix the site key value you used in the steps of this post:
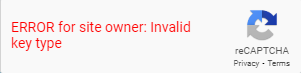
If the following message show up instead, it means the key type you are using it’s not compatible with the recaptcha version you are installing. This tutorial refers to v2 type.
*Notes: this set up was built for standard form pages. If you try to configure a different type of page – that is not a form – it may not work correctly.
Library Forms: Adding CAPTCHA to custom HTML forms
You can use Google’s gratis reCAPTCA product to add CAPTCHA functionality to your ion experiences. To include a CAPTCHA tool on your form(s), you’ll leverage ion’s custom HTML form feature. Please note, CAPTCHA is not available for table-generated forms. Now, let’s get started!
First, you’ll need to pick up a secret key and a site key by visiting the link below to log-in to Google reCAPTCHA. You can log-in using an existing Google account or by creating a new one:
https://www.google.com/recaptcha/admin/create
A server scriptlet and custom HTML form sample are attached to this support post that you can plug into your console. You’ll use these attachments and follow the steps listed below to add a form with CAPTCHA to your ion pages. Now, let’s add the scriptlet to your console, making minor updates to the sample:
1. Open the scriptlet attachment and copy the code.
2. Navigate to the global Libraries menu and select “server scriptlets.”
3. Add a scriptlet category or navigate into an existing one. Paste your code into the editor.
4. Find the line of code that includes “URL += “secretkey=xxxSecretKey”;” and replace “xxxSecretKey” with the one you obtained from Google, then save.
5. Navigate back into the scriptlet and view the URL in your browser window. Make a note of the sscID value in the URL.
Next, let’s add the custom form to your ion console. Attached to this support post, you’ll find a sample custom HTML form that includes the reCATCHA JavaScript outside of the form tags.
1. Open the custom form attachment and copy the code.
2. In your console, navigate to the global Libraries menu and select “forms.”
3. Add a form category, or navigate into an existing one, then add a new form. Label the form, select custom HTML as the “form type” and save.
4. Paste your sample form code into the editor.
5. Find the line containing “Recaptcha.create(“xxxCAPTCHAkey”, element, {” and replace “xxxCAPTCHAkey” with the site key you’ve generated in Google.
6. Find the line containing “result = liveballScriptlet(1,”rct=json”,reqStr);” and replace 1 with the “sscID” value you’ve noted earlier.
7. Save.
This example uses the “white” theme for the CAPTCHA. See Google’s reCaptcha support if you wish to change the theme.
A developer can code additional data fields into this sample form or simply use it as a reference point. If you want to save the data field values into your console, click on the pencil icon labeled “save as is” beside each field, and from the drop-down menus you’ll select the corresponding ion data collection field.
Last but not least, let’s add the form to a test creative:
1. Navigate to a testing or sandbox Portfolio > Campaign and add a creative with a form editor.
2. Click over the form editor and select the form with CAPTCHA you’ve just added to your console.
3. Link the form to a follow-on page
Now you’re ready to test your form with CAPTCHA!
The ion team is available to implement this for you as a project, if you’d prefer for us to do the legwork. Feel free to contact your Account Manager if you have any questions.